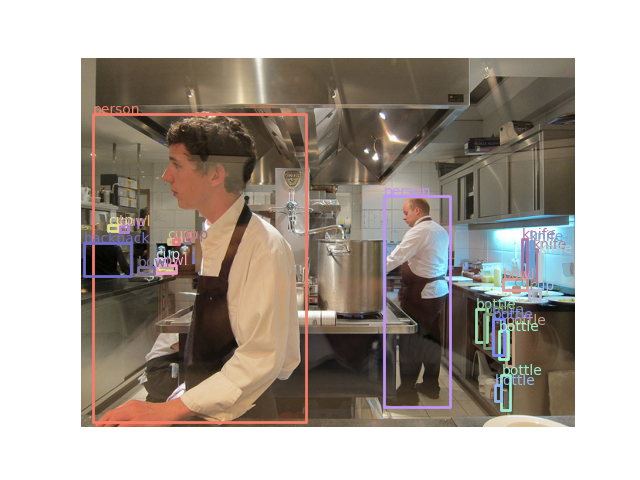
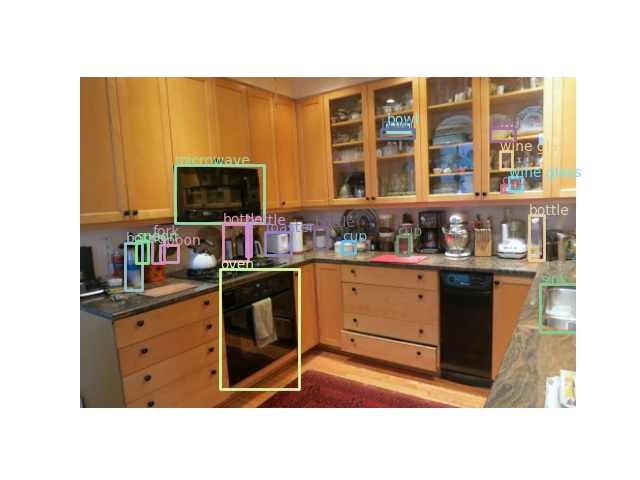
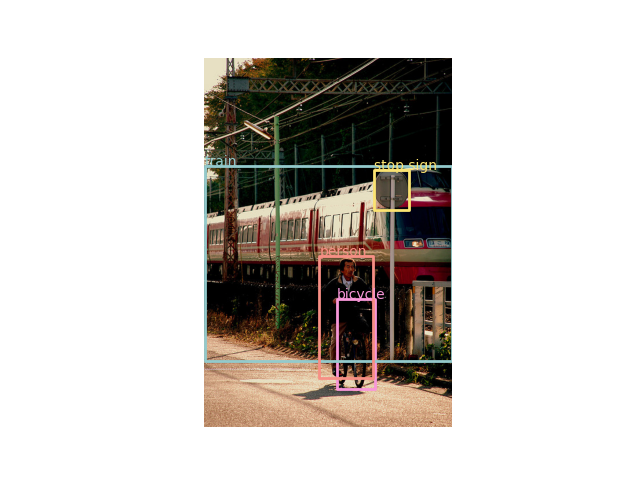
안녕하세요. 최근 Object Detection 관련 논문을 읽으면서 COCO 데이터셋을 많이 활용하는 것을 볼 수 있었습니다. 그런데 지금까지 한번도 Object Detection 코드를 짜보지 않아서 연습해보는 김에 pytorch를 이용해서 COCO DataLoader를 만들어보도록 하겠습니다.
1. Microsoft COCO Dataset
Microsoft COCO Dataset은 Object Detection, Segmentation, Keypoint Detection과 같은 컴퓨터 비전에서 중요한 task들을 목적으로 학습 및 평가까지 할 수 있는 중요한 데이터셋 중 하나입니다. 특히, 많이 활용되는 데이터셋은 MS COCO 2017 데이터셋이죠. 일단, 데이터셋을 다운받아보도록 하겠습니다. 공식링크는 다음과 같습니다.
COCO - Common Objects in Context
cocodataset.org
위 사이트의 상단에 Dataset을 선택하시면 다운로드 가능한 링크를 볼 수 있습니다.

저는 이중에서 2017 Train images, 2017 Val images, 2017 Test images, 2017 Train/Val annotation 파일을 다운로드 하였습니다. MS COCO 2017 데이터는 학습 데이터 118,000장, 검증 데이터 5,000장, 시험 데이터 41,000장으로 구성되어 있습니다.
그런데 여기서 리눅스 계열(우분투) 사용자 분들께서는 다운로드가 안되는 경우가 계실겁니다. 이 경우에는 터미널을 열어서 직접 다운로드 해주어야합니다. 위 사진에서도 보셨다싶이 MS COCO 데이터셋은 거의 25GB 정도로 용량이 큽니다. 이 경우에는 gsutil을 사용하여 다운로드 받는 방법을 권장합니다. 다음은 MS COCO 2017 데이터셋을 리눅스 계열에서 터미널을 이용해서 다운로드 받는 과정을 보여주고 있습니다.
STEP1. 터미널 열기
STEP2. gsutil 다운로드
$ sudo apt install curl
$ curl https://sdk.cloud.google.com | bash
$ source ~/.bashrc
STEP3. gsutil을 이용해서 각 데이터셋 다운로드 (아래의 경우에는 val2017)
$ cd ~/work
$ mkdir cocodataset
$ cd cocodataset
$ mkdir val2017
$ gsutil -m rsync gs://images.cocodataset.org/val2017 val2017
$ mkdir anns
$ gsutil -m rsync gs://images.cocodataset.org/annotations anns
$ cd val2017
$ unzip ../anns/annotations_trainval2017.zip
데이터셋을 정상적으로 다운로드 받았다면 다음과 같이 파일이 구성되어 있을겁니다.

train2017, val2017, test2017에는 영상들만 포함되어 있습니다.

이번에는 annotation 폴더를 보도록 하죠.

참고로 데이터의 Ground Truth는 train과 val 밖에 존재하지 않습니다. 그리고 각 데이터별로 captions.json, instances.json, person_keypoints.json으로 구성되어 있습니다. 오늘은 Object Detection에서 MS COCO를 사용할 예정이기 때문에 intances.json 파일을 활용할 예정입니다.
2. MS COCO Dataloader 구현
MS COCO Dataloader를 구현한 전체 코드는 제 개인 깃허브에 있습니다.
GitHub - skawngus1111/Study
Contribute to skawngus1111/Study development by creating an account on GitHub.
github.com
MS COCO를 쉽게 사용하기 위해 중요한 API가 있습니다. 바로 pycocotools이죠. 이 API를 사용하면 COCO를 훨씬 쉽게 사용할 수 있습니다. 해당 API를 사용하시려면 annotation의 경로가 정확해야합니다.
self.coco = COCO(os.path.join(self.root_dir, 'annotations', 'instances_' + self.image_set + '.json'))
위 코드를 보시면 annotations 폴더에 있는 instances.json 파일 경로를 잡는 것을 볼 수 있습니다. 여기서, self.image_set은 train2017과 val2017 중 선택하면 됩니다. 경로만 제대로 맞으면 해당 API가 알아서 영상, 레이블과 같은 정보를 알아서 불러오게 만들 수 있습니다. 그런데 MS COCO 2017 데이터셋을 사용할 때 주의해야할 점이 있습니다. 원래 COCO 데이터셋에는 91개의 클래스 (person, bicycle, ..., hair brush 등)가 포함되어 있습니다. 하지만, 이 중에서 80개만 사용하고 있죠. 이 중에서 사용하는 클래스에 대한 정보는 다음 링크에서 확인할 수 있습니다.
What Object Categories / Labels Are In COCO Dataset?
One important element of deep learning and machine learning at large is dataset. A good dataset will contribute to a model with good precision and recall. In the realm of object detection in images…
tech.amikelive.com
11개의 클래스 (12 (street sign), 26 (hat), 29 (shoe), 30 (eye glasses), 45 (plate), 66 (mirror), 68 (window), 69 (desk), 71 (door), 83 (blender), 91 (hair brush))는 제외하고 80개의 클래스를 사용하게 됩니다. 그리고 특정 데이터의 annotation이 없는 경우도 존재하기 때문에 이를 제외하는 코드가 필요합니다.
whole_image_ids = self.coco.getImgIds()
self.image_ids = []
# to remove not annotated image idx
self.no_anno_list = []
for idx in whole_image_ids:
    annotations_ids = self.coco.getAnnIds(imgIds=idx, iscrowd=False)
    if len(annotations_ids) == 0 : self.no_anno_list.append(idx)
    else: self.image_ids.append(idx)

self.load_classes()
위 코드를 보시면 self.image_ids에는 사용할 데이터의 번호만 추가하고 self.no_anno_list에는 사용하지 않는 데이터의 번호를 추가하는 것이죠. 여기서, COCO API의 진가가 드러납니다.
- getImgIds() : COCO 데이터셋의 모든 영상의 번호를 로드
- getAnnIds(imgIds, iscrowd) : 해당 영상의 번호 (imgIds)에 대응되는 annotation 데이터의 번호를 로드
- loadImgs(image_idx) : image 번호에 대응되는 image 정보를 로드
- loadAnns(annotation_ids) : annotation 번호에 대응되는 annotation 정보를 로드
데이터를 전처리하는 과정은 다음과 같습니다. 모든 영상의 번호를 가져온 뒤 각 영상의 번호에 대응되는 annotation 데이터를 불러온 뒤 이 중에서 annotation이 없는 영상은 사용하지 않습니다.
다음으로 클래스 번호와 클래스 이름을 key-value 형태인 딕셔너리 자료형으로 구성해줍니다. 그러면 나중에 시각화할 때 좀 더 가시성 있게 만들 수 있겠죠?
def load_classes(self):
    # load class names (name -> label)
    categories = self.coco.loadCats(self.coco.getCatIds())
    categories.sort(key=lambda x: x['id'])

    self.viz_classes, self.classes = {}, {}
    for c in categories:
        self.viz_classes[c['name']] = c['id']
        self.classes[c['name']] = len(self.classes)

    # also load the reverse (label -> name)
    self.labels = {}
    for key, value in self.viz_classes.items():
        self.labels[value] = key
하지만, 문제는 실제 학습하기 위한 클래스를 구성할 때는 0 ~ 79의 정수형을 사용해야 합니다. 하지만, 시각화할 때는 직접 해당 클래스의 번호를 알아야하기 때문에 두 가지 딕셔너리 자료형 (viz_classes/classes)를 정의하였습니다.
이제 영상과 annotation을 불러오는 방법을 설명드리도록 하겠습니다.
def load_image(self, image_index):
    image_info = self.coco.loadImgs(self.image_ids[image_index])[0]
    image_path = os.path.join(self.root_dir, self.image_set, image_info['file_name'])
    img = cv2.imread(image_path)
    img = cv2.cvtColor(img, cv2.COLOR_BGR2RGB)

    return img.astype(np.float32) / 255.
먼저, load_image입니다. 일반적으로 image_index는 __getitem__에서 랜덤으로 index를 선택하기 때문에 신경쓸 필요는 없습니다. 그러면 해당 번호에 대응되는 영상의 정보를 얻을 수 있습니다.
{'license': 3,
 'file_name': '000000391895.jpg',
 'coco_url': 'http://images.cocodataset.org/train2017/000000391895.jpg',
 'height': 360,
 'width': 640,
 'date_captured': '2013-11-14 11:18:45',
 'flickr_url': 'http://farm9.staticflickr.com/8186/8119368305_4e622c8349_z.jpg',
 'id': 391895}
영상의 정보는 위와 같이 딕셔너리 형태로 구성되어 있습니다. 이중에서 저희가 봐야할 것은 file_name입니다. 해당 file_name에 대응되는 영상의 정보를 opencv를 이용해서 불러오면 영상을 불러오는 것은 쉽게 할 수 있습니다. 다만, opencv를 불러오는 것은 BGR로 불러오기 때문에 RGB로 바꾸어주어야 합니다.
def load_annotations(self, image_index):
    # get ground truth annotations
    annotations_ids = self.coco.getAnnIds(imgIds=self.image_ids[image_index], iscrowd=False)
    annotations = np.zeros((0, 6))

    # some images appear to miss annotations
    if len(annotations_ids) == 0:
        return annotations

    # parse annotations
    coco_annotations = self.coco.loadAnns(annotations_ids)
    for idx, a in enumerate(coco_annotations):

        # some annotations have basically no width / height, skip them
        if a['bbox'][2] < 1 or a['bbox'][3] < 1:
            continue

        annotation = np.zeros((1, 6))
        annotation[0, :4] = a['bbox']
        annotation[0, 4] =  self.classes[self.labels[a['category_id']]]
        annotation[0, 5] = a['category_id']

        annotations = np.append(annotations, annotation, axis=0)

    # transform from [x, y, w, h] to [x1, y1, x2, y2]
    annotations[:, 2] = annotations[:, 0] + annotations[:, 2]
    annotations[:, 3] = annotations[:, 1] + annotations[:, 3]

    return annotations
다음으로는 해당 영상에 대응되는 annotation을 불러와야합니다. 먼저, annotation이 어떤 형식으로 구성되어 있는 지 보도록 하죠. 여기서 주의해야 할 점은 하나의 영상에는 여러 개의 객체가 존재할 수도 있다는 점 입니다. 따라서, 리스트의 형태로 각 객체의 annotation이 딕셔너리 형태로 존재하게 됩니다.
dict_keys(['segmentation', 'area', 'iscrowd', 'image_id', 'bbox', 'category_id', 'id'])
각 annotation은 위와 같은 key를 가지고 있습니다. 저희는 이중에서 'bbox'와 'categorical_id'를 가져와야합니다. 여기서, bbox는 좌상단의 $x$좌표와 $y$좌표, 그리고 가로/세로 크기가 저장되어 있습니다. 다음으로 annotation의 categorical_ids가 12, 26, 29, 30, 45, 66, 68, 69, 71, 83, 91 중 하나라도 포함되면 영상 내의 해당 객체는 사용하지 않습니다. 따라서, 이 중에서 필요한 annotation 정보만 뽑아오도록 하는 과정이 for 문으로 구현되었습니다. 뿐만 아니라 일반적으로 bbox의 위치는 좌상단, 좌하단, 우상단, 우하단에 대응되는 점들을 정해놓기 때문에 bbox 정보를 수정해주어야합니다.
여기까지 오셨으면 MS COCO를 사용하기 위한 모든 사전준비가 완료되었습니다. 이제 실제로 시각화를 해보고 오늘의 포스팅을 마무리하도록 하겠습니다.


'Programming > Pytorch&Tensorflow' 카테고리의 다른 글
| [Pytorch] UserWarning: resource_tracker: There appear to be 120 leaked semaphore objects to clean up at shutdown (0) | 2024.05.29 |
|---|---|
| [Pytorch] PASCAL VOC 2012 Segmentation Dataset 사용하기 (0) | 2023.02.21 |
| [Pytorch] ImageNet Dataset 사용하기 (0) | 2023.01.05 |
| [Pytorch] 생초보의 파이토치 일기 - MNIST 손글씨 데이터 분류 99% 달성하기 2 (2) | 2020.08.30 |
| [Pytorch] 생초보의 파이토치 일기 - MNIST 손글씨 데이터 분류 99% 달성하기 1 (0) | 2020.08.28 |
